As we (try) to train Coco, one of the big tasks is being able to leave the dog alone for a decent amount of time (made trickier by the fact that both Julie and I work from home so are usually always around).
We also learnt from our Battersea training that if the dog has a negative association with being left alone (because, for example, there's no build up) it can be distressing for the dog.
So I built a small bit of hardware that monitors for sound, logging to an SD card and then visualises it in the browser. Here's how I did it.
Hardware
I'm a big fan of "as cheap as possible", so here's the shopping list with approximate prices I paid:
- RP2040 Zero - a mini Raspberry Pico that does the logic work - £1.48
- INMP441 Microphone module - probably overkill, but I picked it up - £1.26
- OLED 128x32 0.91" - just to show it was working (not really needed) - £1.37
- MicroSD card breakout board+ - completely overkill, but I had it laying around - £7.20
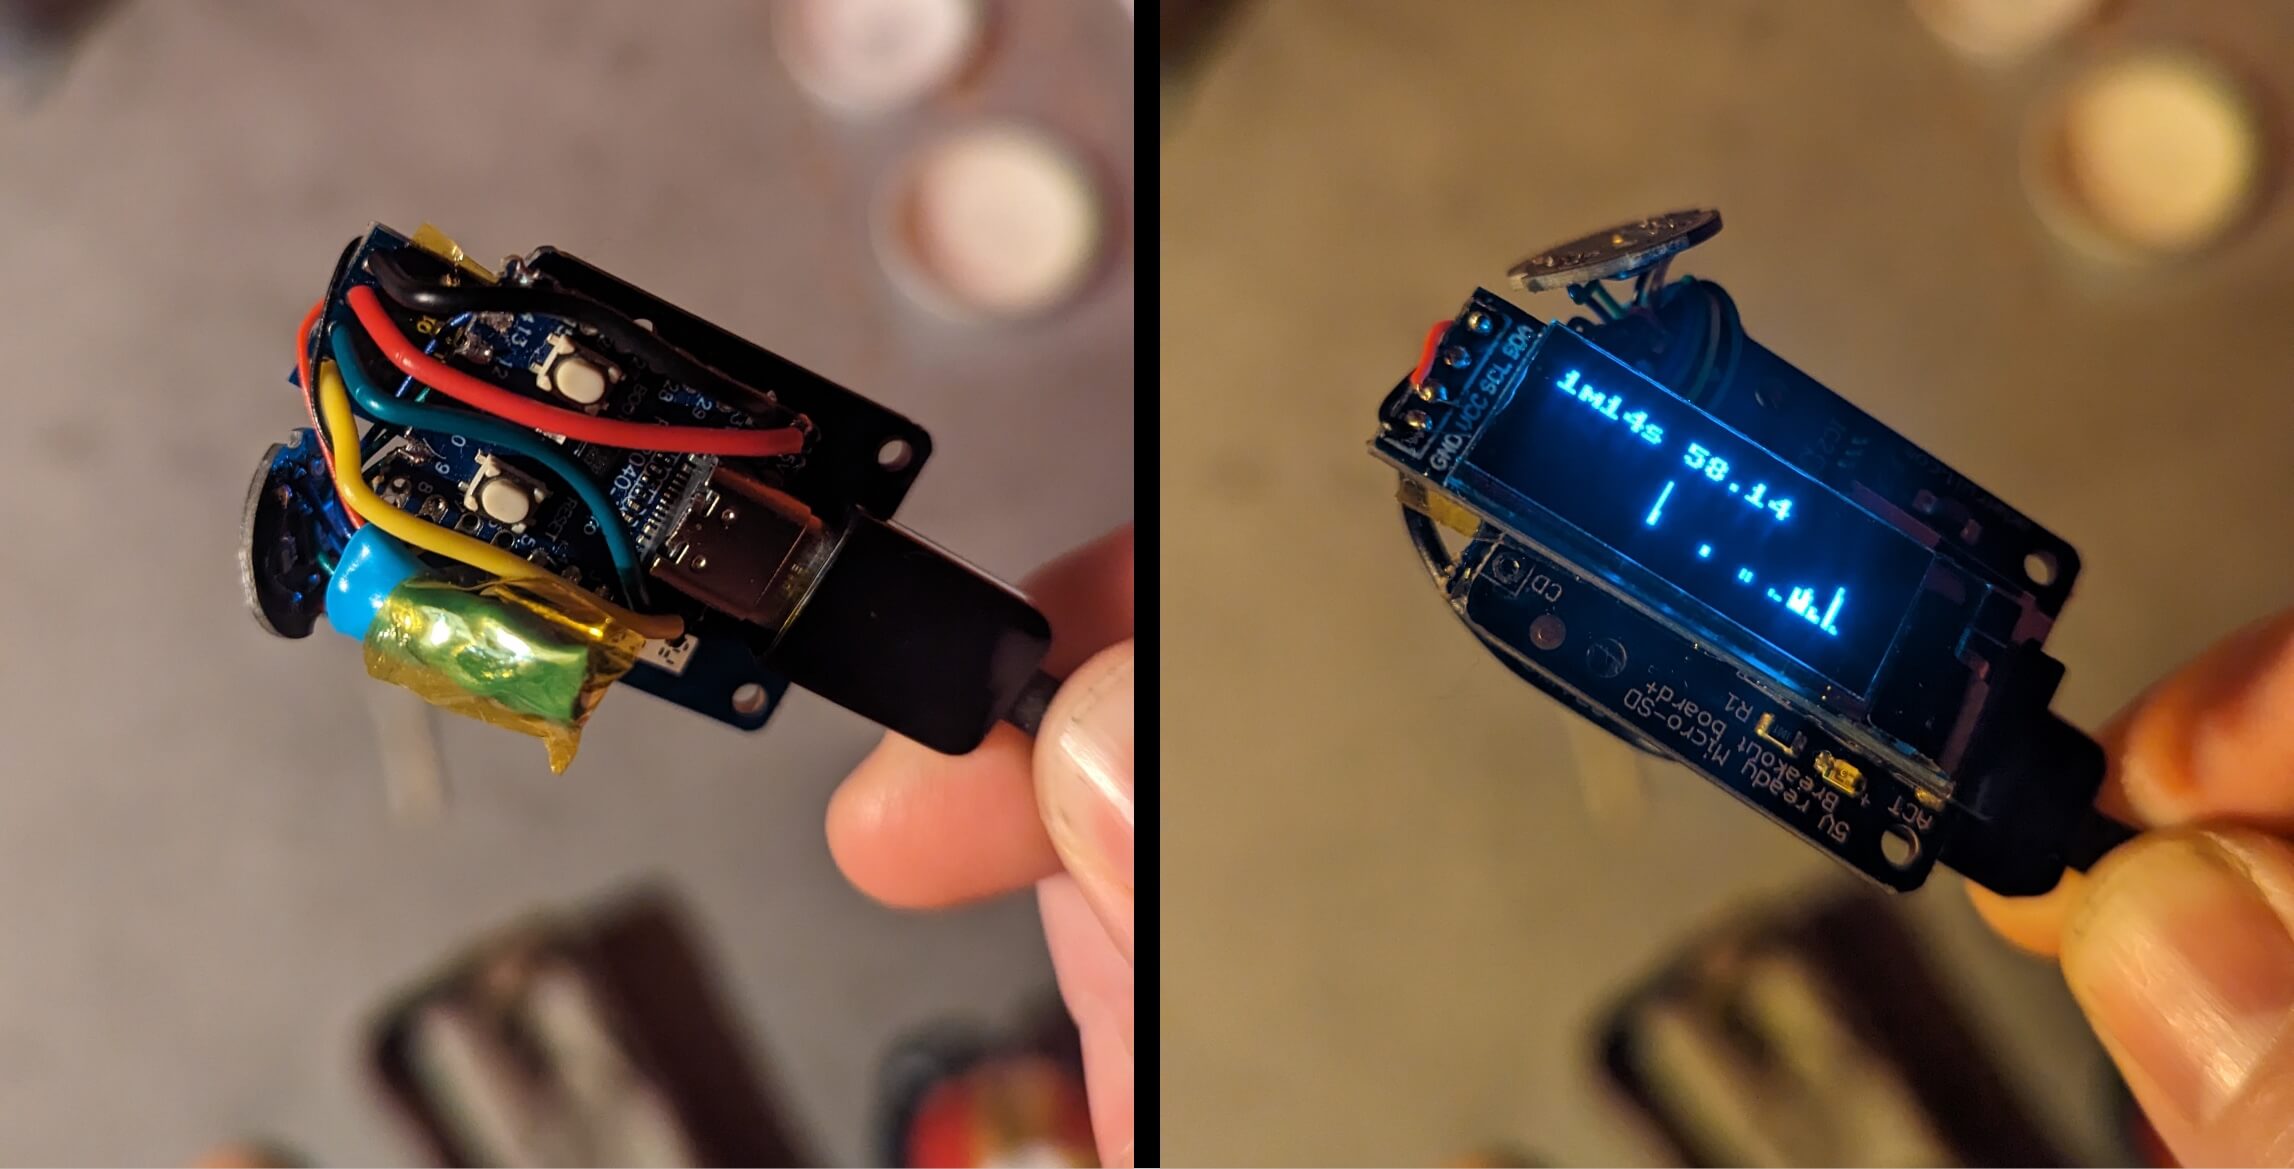
Powered from USBc. Once it's booted up, it'll show a "Waiting to start" on the display, then I use the "boot" button on the RP2040 to signal the start of recording.
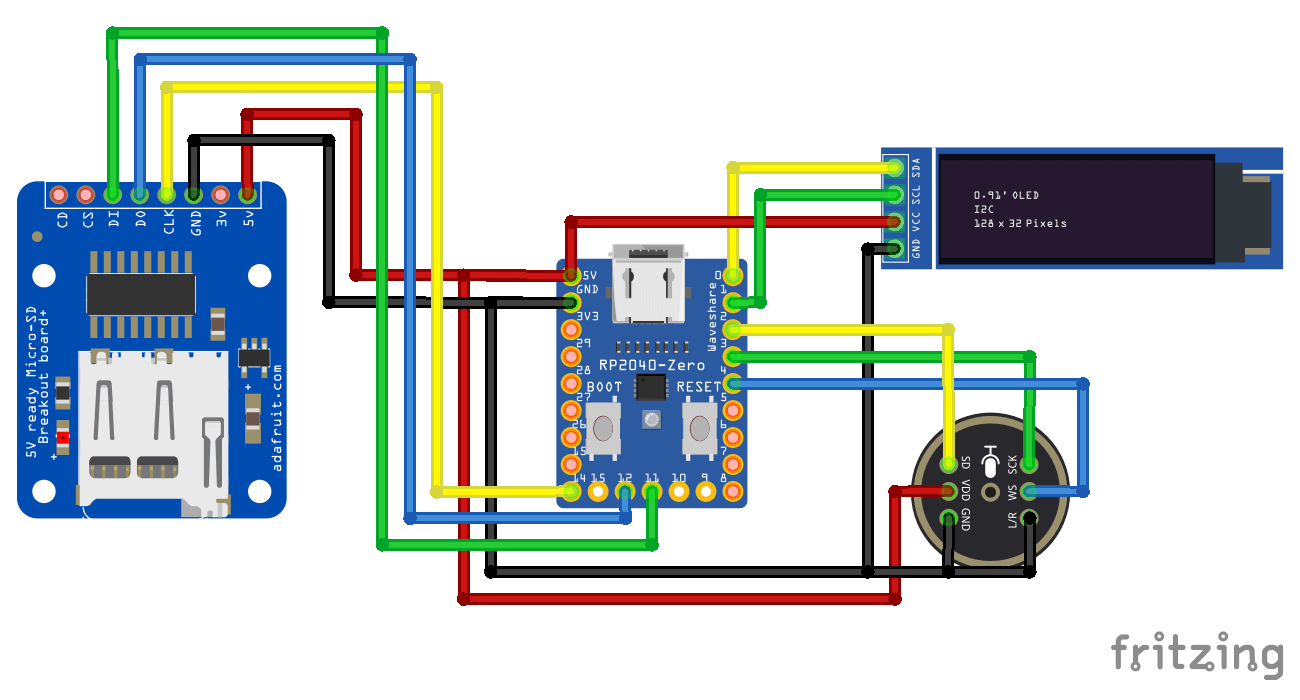
Below is the wiring (sorry, I'm not great at Fritzing). Because I'm taking the super cheapo approach, the final build result is very scrappy.

Once wired up, there's two software components. The first is the firmware for the RP2040, written in micropython, and the rendering of data that's stored on the SD card (which is done in the browser).
Once I had this wired up, instead of 3D printing a fancy case for it, I just squished all the parts together to make a weird ball of wires and bits!

Yes, I know, it's a hot mess.
Software on the hardware
The bulk of the code in micropython is mostly noddy code that creates instances of hardware (such as the OLED display).
The full source is available here (doggie-loggie.py) (or as a gist if you prefer). It's not anything special.
The micropython also requires you add a package called "SSD1306_I2C" - in Thonny once the RP2040 is connected via USB, Tools -> Manage Packages and search for the package and add.
The code also uses a patch on the boot button to treat it as a user button (which I quite like - and can also be done on the Raspberry Pico which I've done before). This is achieved with the following snippet of code:
import rp2

if rp2.bootsel_button():
  # do a thing
The code to calculate the amount of sound was courtesy of Copilot 🤭 - though the code was wrong on a few occasions, eventually I ended up with something that gave me a value of 50-60 for "quiet" and 100 for loud. Whether this is actually decibels isn't really important - it's enough to know there's sound.
This data is visualised on the OLED display (which is kind of pointless, but I used it to debug) but also written to the SD card.
Each time the toggleRun function starts (a new "loggie"), a single 0x255 byte is written to the /sdcard/doggie.log file. This is my simplistic header (or just a marker that I can split the data on), then the noise capture callback runs every one second.
The sound value is mapped so that it can be charted, but also compressed to a scale from 0 to 120. This also means that I can store this converted value on the SD card as a byte since it'll never be our marker value of 0x255. So now I have a series of data that's captured every second as a single byte.
Software-software
Once the logging process is over, I'll pull the power from the device (which is fine for the SD card since each write opens and closes the file - overkill, but did the tricks for me).
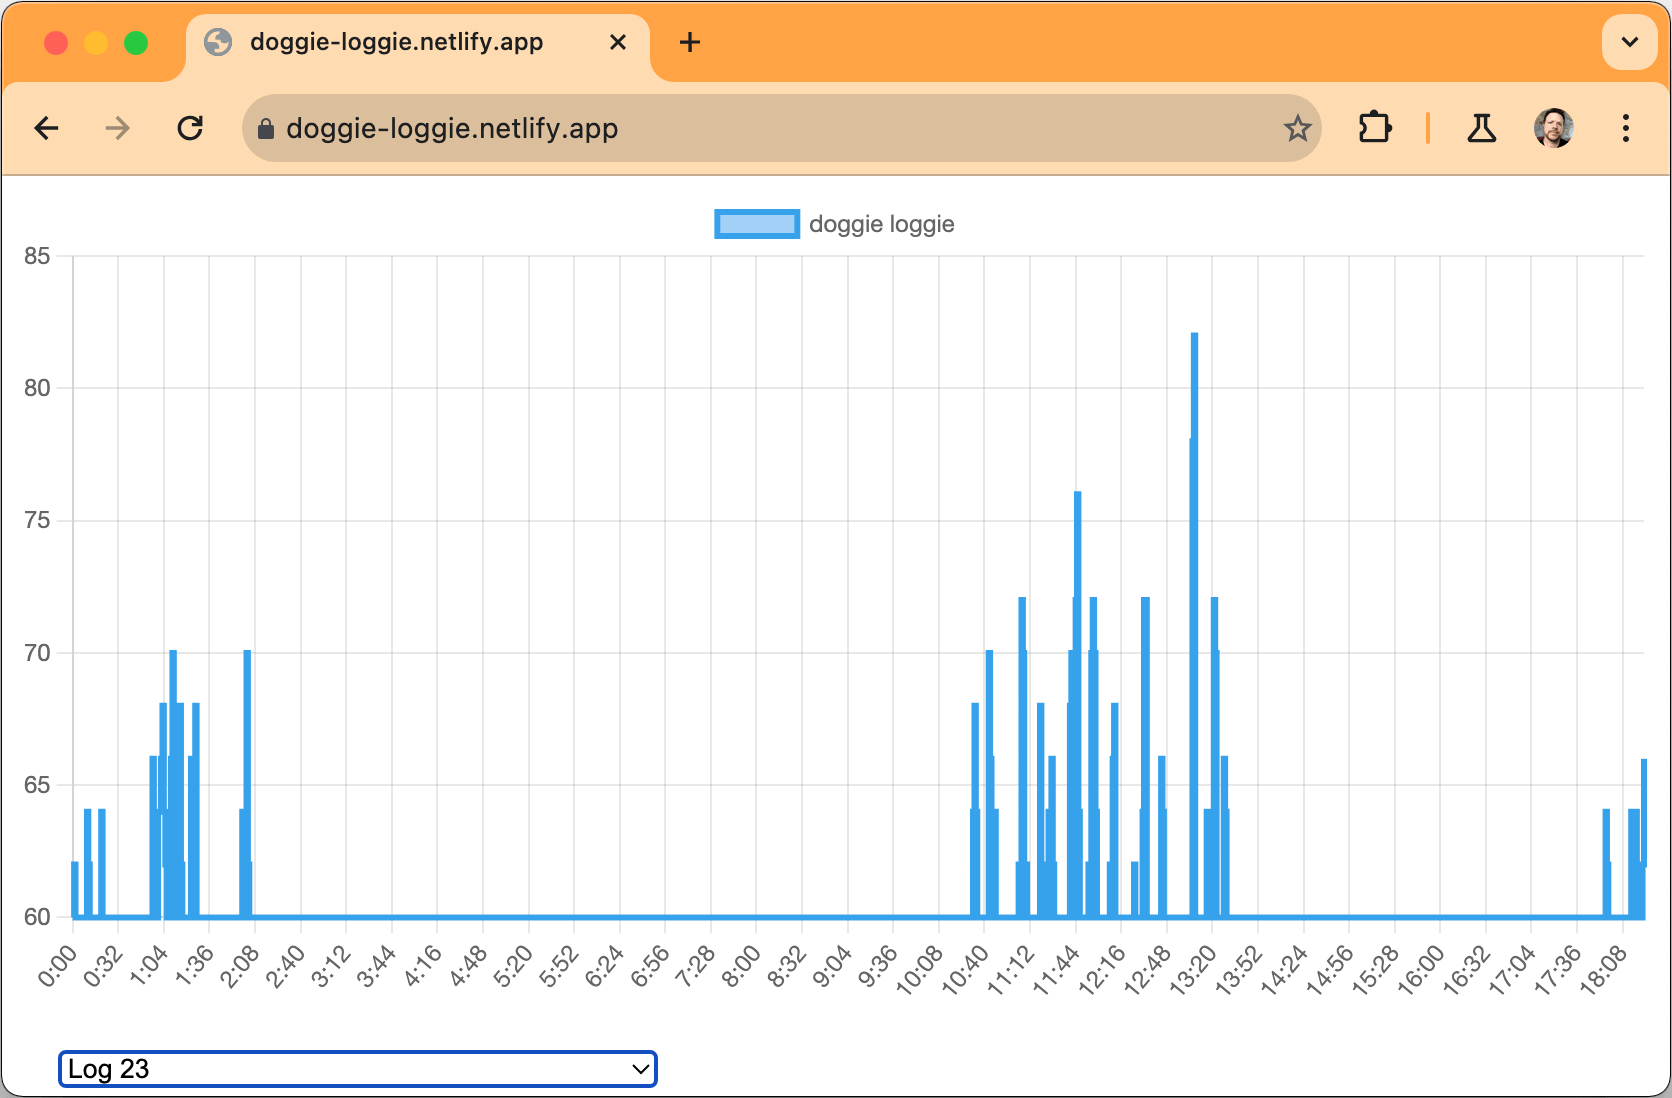
Then the file is dragged into a browser window. The data is split by 0x255, and then the value is rebased back to the rough decibel values (approximately n * 2 + 60) and then rendered into the chart.

In practise
In reality, there's not a huge demand for using this. We've used it when we left Coco for an hour and quickly realised we'd ramped up her alone time too quick (we could see she was whining and crying nearly all the time), so we reset back to 15 minutes and are doing that daily, then increasing the time (we're on 20-25 minutes so far).
I guess you could repurpose this project to hide it under a Christmas tree to see if Santa makes any noise whilst dropping off presents, but I suspect his magic dust interferes with audio waves… I'm sure there's some other useful use. If not, I certainly learnt a couple of new tricks.